WARNING
RISK OF ELECTRICAL SHOCK
Disconnect power before servicing
WARRANTY
The Breaking Ball Bracket is an official PowerNet accessory for the Launch F-lite Pitching machine. Installation does not void your original warranty.


Instructions
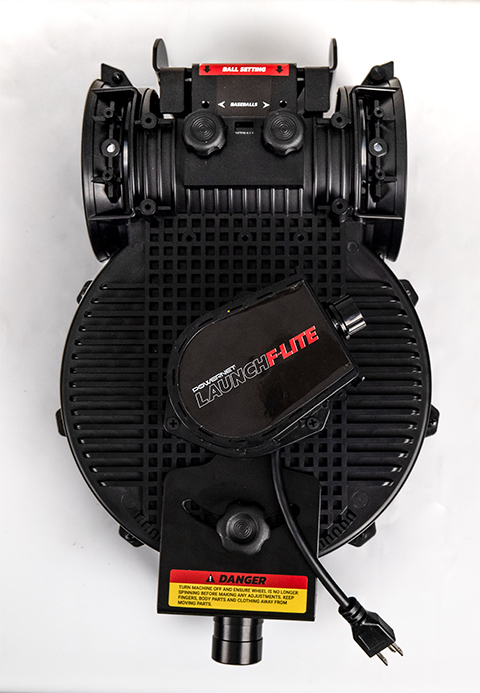
STEP 1 – Control box
- Lay pitching machine face-down on the Control Box.

STEP 2 – remove screws
- Remove the 3 Spindle Cover Screws that secure the Spindle Cover.
- Set the cover and screws aside to be reused for later.

STEP 3 – remove bolt
- Once the Spindle Cover is removed, you should now have access to the 12mm Bolt and Washer.
- Remove the 12mm Bolt and Washer.

STEP 4 – flip machine over
- Carefully flip the pitching machine over so that the Control Box is now facing you.
STEP 5 – remove screws
- Remove the 3 Control Box Screws.

STEP 6 – set control box to side
WARNING
DO NOT PULL ON WIRES. During this process, the wires will NOT be disconnected
- Once the Control Box is free, very carefully lift the Control Box and set it out of the way as shown.
- Be careful as there are wires that connect the Control Box to the back of the motor. Do not tug or pull on these wires as this will damage the pitching machine.


STEP 7 – Remove Adjustment Knob
- Unscrew the Adjustment Knob to remove it.

STEP 8 – Remove 12mm Bolt
- Remove the 12mm Bolt and Washer.
- Set these aside, you will use them in a later step.

STEP 9 – Slide Bracket Free
- Once the original bracket is free, carefully slide it off the pitching machine.

STEP 10 – Insert Breaking Ball Bracket
- Slide the new Breaking Ball Bracket into place.

STEP 11 – Line Up Hole
- Make sure the Half Moon Slot lines up with the Adjustment Knob hole location.

STEP 12 – Replace Bolt and Washer
- Screw the 12mm Bolt and Washer back in.
WARNING
Do not over tighten the Bolt. The Bolt should only be about hand tight; this will ensure that the bracket can move freely.

STEP 13 – Reassemble Control Box
WARNING
Carefully tuck all the wires back inside the control box without pinching or damaging any of the wires.
- Position the power cord in the notch as shown in the image.
- Put the Control Box back to its original position making sure that the screw holes line up.

STEP 14 – Replace Screws
- With the Control Box Screw locations aligned, screw all 3 back in.

STEP 15 – Flip Machine Over & Replace Bolt
- Flip the pitching machine over and rest the pitching machine on the Control Box again.
- Screw the 12mm Bolt and Washer back in.
- ⓘ You may need to gently lift the Breaking Ball Bracket to help line up the bolt hole.
WARNING
Again, do not over tighten the Bolt. The Bolt should be only hand tight; this will ensure that the bracket can move freely.

STEP 16 – Replace Spindle Cover
- Resecure the Spindle Cover with the 3 Spindle Cover Screws.

STEP 17 – Flip Machine Over and Adjust Knob
- Flip the pitching machine over one last time with the Control Box facing you and screw the Adjustment Knob back in.

